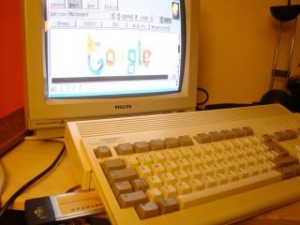
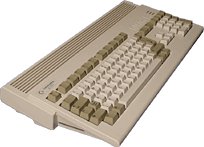
Amiga 1200 browsing internet
Amiga 1200 browsing internet with a pcmcia Netgear card, I used Genesis tcp demo and a modified version of prism2.device, called prism2v2.
The spec of my Amiga are:
– Blizzard 1220/4 + 4mb fast ram.
-Ibrowse
-Genesis Tcpip Demo
Follow this guide: http://bytemyvdu.wordpress.com/2012/02/08/the-internet-and-an-amiga-a1200-prism2v2-drivers-wpawpa2/
Guide taken from the site bytemyvdu:
The Internet and an Amiga A1200 – Prism2v2 drivers, WPA/WPA2
Posted: February 8, 2012 | Author: heamogoblin | Filed under: Classic, Commodore, Vintage Computers | Tags: Amiga,commodore, MA401, Netgear, wifi |12 Comments »
Commodore Amiga’s, WIFI and the internet (OH and Whoa)
For some time now I have enjoyed the delights of a wireless Amiga experience. Something up until recently i assumed anyone mad or sad enough was doing with their Amiga’s. In actual fact, my trusty Amiga 1200 has been surfing the world wide web since early 2009. Ever since i joined the Lincolnshire Amiga group and a member pointed out the PCMCIA port of my old miggy could be put to more use then sitting and look pretty. Having not used my A1200 for at least 10 years, i had a lot of catching up to do. And the idea of getting a 20 year old computer online was just too hard to resist. Needless to say with the help of Rockape, I was soon surfing the net and have been ever since.
Now with the history lesson out of the way, we come to present day 2012. I attend my first LAG meeting of the year and discovered new drivers have been released allowing my Amiga to understand WPA and WPA2 encryption. Surely not! the one bane of having a wireless Amiga has been that it restricts the level of security you can have on your home wifi to WEP or reserving MAC addresses. IMHO WEP is as effective at keeping your network secure, as putting a “Please don’t nick the telly” note on your front door for the burglars to read. Using MAC address filtering to only allow certain machines on your network is all well and good, but if you have friends around for an evening with say a laptop or tablet. Do you really want the hassle of turning on your computer to add your friends MAC address to your router? My answer is a flat NO! Ok WPA and WPA2 are not crack proof, but it still takes effort to break them.
So with news of the new drivers, i was eager to give them a try. Now for those of you who have not had much luck getting online yet with their Amiga’s. Here is my setup
A1200 – ’020
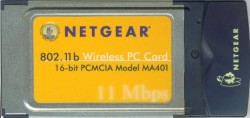
Netgear MA401
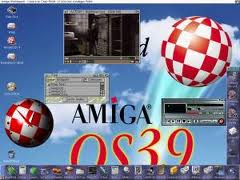
WB 3.9 (funziona anche con WB3.1)
MUI 3.8
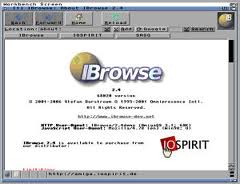
 Ibrowse
Prism2v2 (from Aminet)
CardPatch & CardReset (from Aminet)
I shall not be covering the entire process of installing all this software, as a guide is already available on Wiki here Internet for A1200. If however you are hitting difficulties, feel free to contact me here or via Amiga.org. My user name is “Hiddenevil”, you will also occasionally find me lurking on the Amiga.org IRC chat room.
Part 1 – Prism2v2 and WPA/WPA2 & Firmware Flashing
ATTENTION READER – The following section describes and instructs you how to flash a MA401 wireless card. If you follow these instructions, you are accepting responsibility for the results. If you turn your card in to a jolly interesting paper weight, it is not my fault! You flashed it not me. However the follow method did work for me and as a result i now have two Amiga 1200′s using Netgear MA401′s online with WPA2. Netgear MA401 drivers can be found on the Netgear website, it will ask you to register but if you look closely you can skip this process and download the drivers.
Firmware – Out of the two Netgear MA401 cards we have, neither of them would connect to our network when tested on an old laptop running Windows XP. This is usually a sure sign that the firmware on the card needs updating. The Prism2v2 manual does give advice regarding flashing the cards, however I found the site suggested to be some what confusing. I’ve flashed phones, mp3 players and even Android tablets, the latter was a pain in the butt. I had never flash a PC card before and was not entirely sure what i was doing. Until i fell upon a guide that was very handy indeed.
Flashing MA401 Guide– Posted to Alt.Internet.Wireless by a user called Norm, back in 2004. I found his guidence to be immensely helpful. There is a wealth of information on the link i have provided and i highly recommend readers to pay close attention and read it thoroughly, it’s not a race, READ the tutorial slowly, a mistake will brick your card. To flash your Netgear MA401, you will need access to the following.
– PCMCIA port
– A Windows or Linux operating system
While i do run Ubuntu on several machines, the only computer i had handy to perform the flashing on Sunday. Was an old Novatech laptop running Windows XP SP3. As the guide is written from a Windows XP users view point, i would probably recommend you try follow suit, just to avoid more complication.
So you’ve possibly found a laptop still running Windows XP GREAT! So lets begin, for this next part I will pass you over to Norm. The mysterious do gooder who’s guide helped me. Dont worry, i’m not going anywhere..I’ll be right here watching over your shoulder, like the nosey sod I am.
The process (in brief) is:
– install Linksys WPC11 drivers
– use Intersil’s WinUpdate to update the card firmware
– install the WPA hotfix for Windows XP
– install WPA-enabled drivers
It’s common knowledge that the MA401 uses the Intersil Prism II
chipset. Most of the information on updating the firmware I got from
http://linux.junsun.net/intersil-prism/ (this is an excellent page and
also outlines how to do this under Linux)
Things you’ll need:
WinUpdate – this is Intersil’s Windows utility for updating the
firmware on Prism II-based cards. I got it from
http://linux.junsun.net/intersil-p […] -0-7-0.exe but it can
be found in a few places.
Firmware files – there are two files you need, a primary and a station
firmware file. I got them from
http://linux.junsun.net/intersil-prism/firmware/1.7.4/ but Jun Sun’s
page lists several other sources. Although there are multiple firmware
files, the ones I needed to update my cards were:
pk010101.hex – this is primary firmware version 1.1.1
sf010704.hex – this is station firmware version 1.7.4
Drivers for the Linksys WPC11 v2.5 from the Linksys website. I had to
install these drivers instead of the Netgear drivers to get WinUpdate
to communicate with the card properly during the firmware upgrade.
Step-by-Step:
I’m assuming you already have the Netgear card and its drivers
installed. You need to go to Device Manager, right-click the Netgear
card, choose Update driver, choose “Install from a list or specific
location”, select “Don’t search. I will choose the driver to install”,
click Have Disk and browse to where you extracted the WPC11 drivers.
In the WPC driver setup files there’s a WinXP directory with a
LSWLNDS.INF file that you should select. You should see “Instant
Wireless Network PC Card V2.5″ listed as the driver to install. When
you continue with the driver install, you may get a message saying
that the install process is going to update the firmware on your card.
Click Cancel when that message appears and close the Linksys firmware
update utility if it opens. When the new driver is installed you’ll
be able to run WinUpdate and update the firmware.
(Hey, hello!!? it’s me *waves*, see you thought i’d left didn’t you?. Well let me just interrupt Norm for a moment. When I ran the WinUpdate software for the first time, it did throw up an error. The first error was regarding the card, that it was unable to identify it.
Unlike Norm in 2004, i found the Linksys drivers to be the problem. So I rolled back to the original Netgear drivers and found this resolved the issue. In the next chapter he will talk about using the WinUpdate software. I would suggest that you try running Winupdate without installing the Linksys drivers. If you do get an error, install the drivers and give it another shot..now back to Norm)
Download and install WinUpdate. Open WinUpdate from the Start menu
under Prism Test Utilities. It should list the “Instant Wireless
Network PC Card V2.5″ under Valid Adapters and will probably have
selected the adapter automatically. If not, highlight it and click
Open Adapter. In the bottom part of the window, click the Add File
button and select the primary firmware file (in this case called
pk010101.hex) and then repeat the same process to add the station
firmware file (called sf010704.hex). You should now see both files
listed in the window with a small P and S icon beside each file.
Confirm that the versions (1.1.1 and 1.7.4) show up correctly and then
click Continue. WinUpdate will do some quick checks to make sure the
firmware and your card match. If you get any strange errors here make
sure you stop and resolve them before continuing. I got errors at
this point before using the Linksys drivers, so make sure you’ve done
that. If WinUpdate doesn’t find any problems you’ll see an Update
Information window that lists information about your card like it’s
Platform, MAC Address and current firmware revisions. Below that will
be the paths to the new firmware files. If it all looks okay, click
on the Update button and the firmware will be updated. You’ll see two
windows, one after the other, that say “Flash Update in progress…”
and when they are both gone you should see a message that says “Update
successful”. To confirm that you card has been updated, go to the
Tools menu and select Query Firmware Version. You should see primary
firmware at 1.1.1 and station firmware at 1.7.4.
Hey how did it go? did you get it flashed ok? When i came to flash my second MA401 card, I encountered an error saying it could not be updated due to the card being 8008 platform. Now if you have been paying attention and read the page i linked, you might have noticed the comments that came after Norms guide. Others where having the same issue.
“I just tried to update my MA401 firmware and I also encountered the
same problem you have. But I just give it a try to update the station
file only for 8008 platform, s1010701.hex. Then follow the rest steps.
The MA401 card works well right now with WPA support.
You can download the file here.
http://linux.junsun.net/intersil-p […] 010701.hex,
which is the station file for 8008 platform. “
Unlike before, you do not need two files to update this card, i simply loaded the s1010701.hex file in to WinUpdate and flashed the card. I found this sorted the problem
PART 2 Prism2v2 driver
Curiously something I noticed when installing the new drivers I obtained from Aminet. Was that the manual did not give much mention to WPA2. Perhaps this is a lack of looking on my part, but i could not find mention of WPA2 encryption settings. It did not help matters that the Installer only asks for a WPA passphrase and does not give you the option of entering in a WPA key. We can’t judge to harshly i suppose, as these drivers are free and truly I have nothing but gratitude for the people behind their development. However i think a revision of the manual and perhaps the installer is needed to help people who dont find all this a walk in the park.
Originally in the old setup, the Amiga received all of the important information about the WIFI setup through the user-startup sequence, using the line.
“C:SetPrism2Defaults SSID xxxxx KEY xxxxxxxxxx”
However this has now been replaced with a file found in you C:\Envarc\sys\wireless prefs
Open this file up and you will find the settings for your wifi. Unless you are using a passphrase on your network, you will want to replace everything in this file, with one of the examples found in the prism2v2 manual. Make sure you copy and paste the one for the WPA network! and alter it according to your network settings. If your using WPA2, you use the same settings as for WPA. This is something i didn’t see mentioned in the manual and held me up for a good hour, scratching my head.
Once you have done this, check your user-startup sequence found in your “C:\S\”. Make sure to place a “;” before all the “SetPrism2defaults” entries, otherwise you might confuse your poor Amiga. So you should have something that looks like “;SetPrism2default SSID xxxxxx KEY xxxxxxx”. With that done, turn off your Amiga and insert your wireless card. Turn the Amiga back on and get in to Workbench.
Once your booted, run MiamiDX and click the “Online” button, you should find it connects. If at first it doesn’t work, try again, sometimes it doesn’t work right away.

